

How To Upload A Topography To Revit
Ceremonious engineers typically employ a 3D CAD program to model topography for a site. When we receive their CAD file for a site, nosotros have to import it into Revit to create a topography surface that nosotros can then edit.
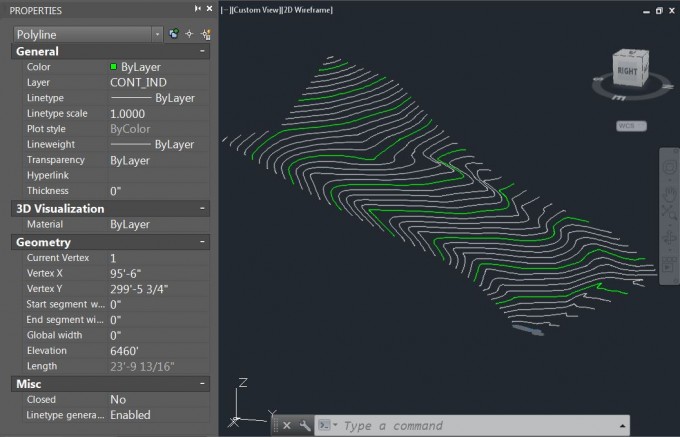
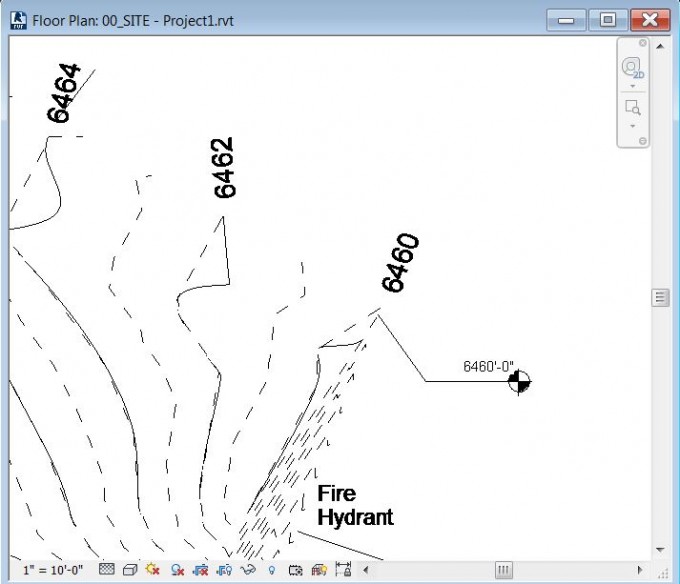
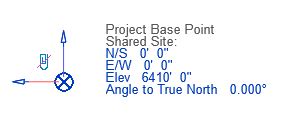
Before you create topography in Revit, brand certain that your Survey Point is set to a known top on your topography. For this instance, I am using a Survey Point of 6,460′ (USGS Elevation) which corresponds to the first topo line on the Northeast corner of my site program.
1. Inspect the CAD file the civil engineer gave yous. This cannot be but any CAD file. It has to be a CAD file with the topography represented in the 3 dimensions. You lot can hands cheque this in AutoCAD if you lot click on a topo line and wait at the superlative in the backdrop console. Y'all can also orbit the drawing to check that the topo lines create a legible surface.
While you have AutoCAD open, you can go ahead and make a mental note of the layer names for the topography lines. We are going to tell Revit which layers to import from this CAD drawing. Civil engineers typically label topography layers contours, major contours, and/or minor contours. Bank check that only the topography lines are on these layers and not another miscellaneous lines. It's ok if in that location are other lines on other, non-contour layers.
ii. Import the CAD file into Revit. In your Revit projection, open up a plan view. Become to the Insert Ribbon and click on Import CAD. Make sure that "Current View Only" is unchecked.
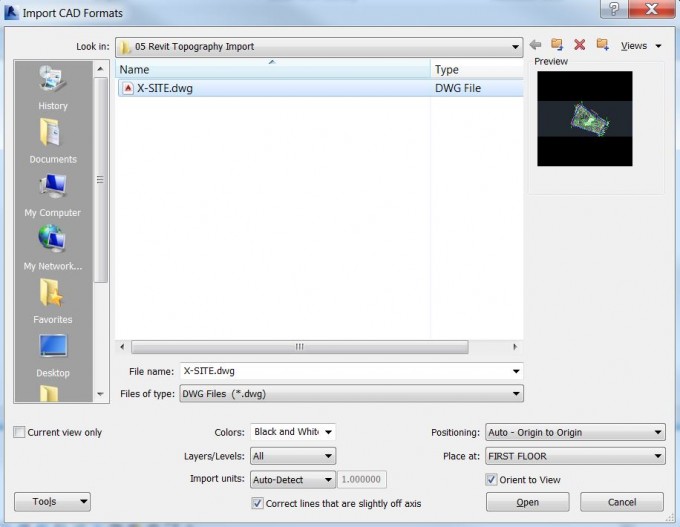
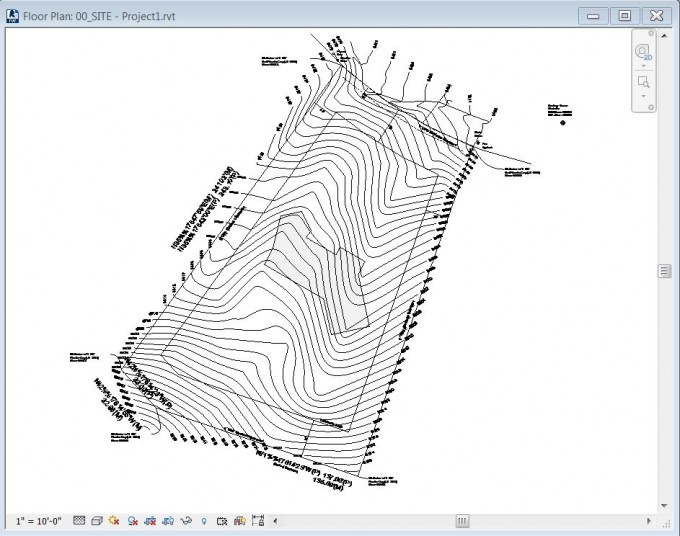
Click open, and your imported CAD file should be visible.
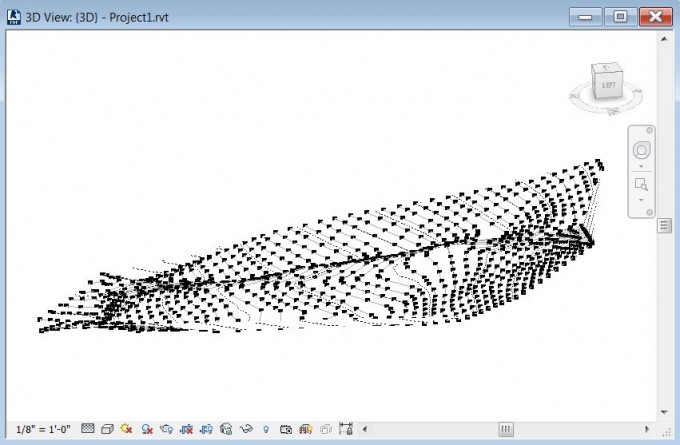
3. Create the topo surface. In the Massing & Site ribbon, click on Toposurface. Select the Create from Import dropdown and and so click Select Import Case.

Select the CAD site plan that you just imported. Adjacent yous volition be presented with window where y'all can pick only the contour layers to utilise for the topography. These are the profile layers that you fabricated a note of in Pace 1.
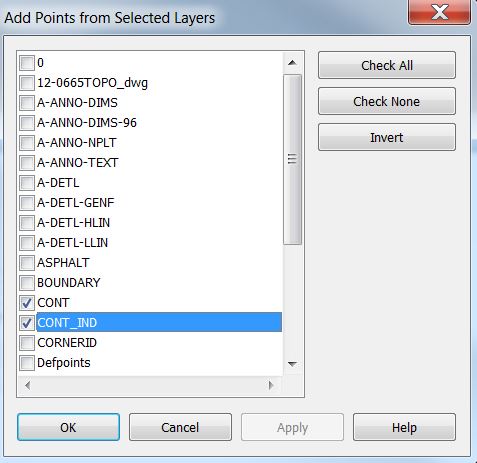
Click OK on this window and Revit will create a toposurface with points based on the layers you selected.
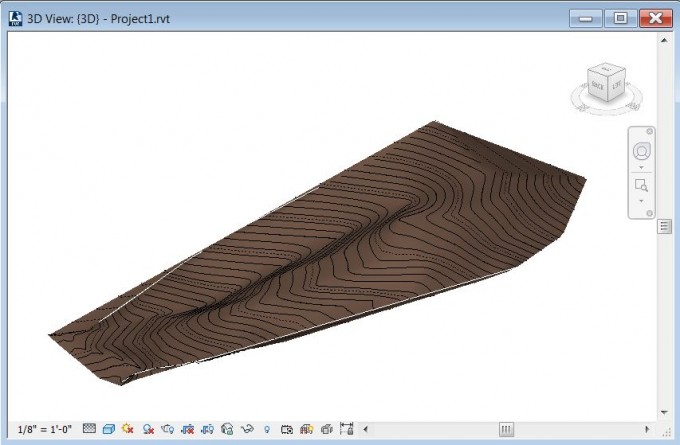
Click on the check mark in the ribbon carte and your topo surface is complete.
three. In your programme view, add a spot elevation (the elevation origin of this spot elevation should be set to Survey Point). Your toposurface is probably not at the right elevation. So merely motion it (along with the imported CAD file) in an elevation view until the spot elevation matches up. You tin go ahead and hide the imported CAD file as you lot should but need it for reference now.
4. In an superlative view add a level for your outset flooring. I am showing 2 levels beneath – ane is based on the project base point and the other is based on the survey point. This is a good manner to check that you have both set correctly.
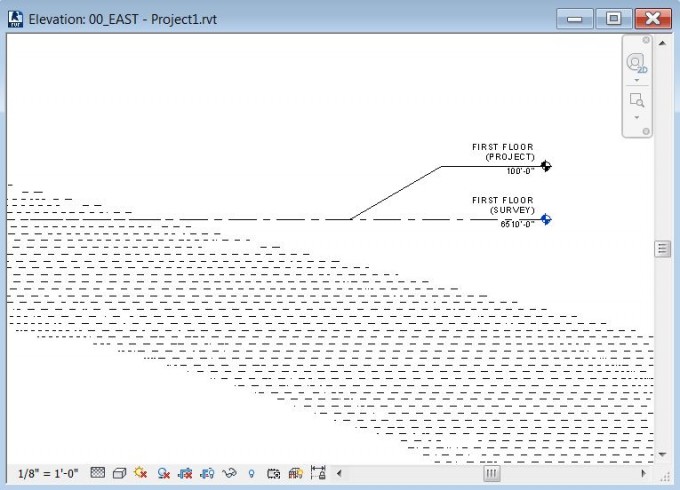
If your projection base point and elevation are off, you can just unclip the project base point and motion it to the desired pinnacle. EVstudio standards crave the first floor acme to exist at 100'. So I accept fix the Project Base of operations Signal superlative to 100' below the Survey Point top at the first flooring (6510'-100'=6410').
five. Finally, you lot can tweak some of the topography graphics. You can use the Label Contours tool in the Massing & Site menu to describe a line beyond the topography and the contour line elevations will exist displayed.
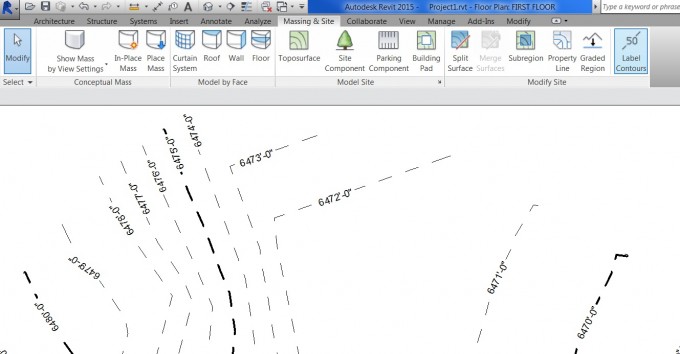
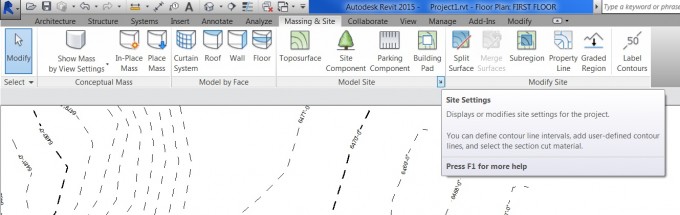
Primary contours should be on 10' intervals and display as a darker dashed line. You can edit interval past clicking on the Massing & Site ribbon menu and the clicking on the arrow beside Model Site:
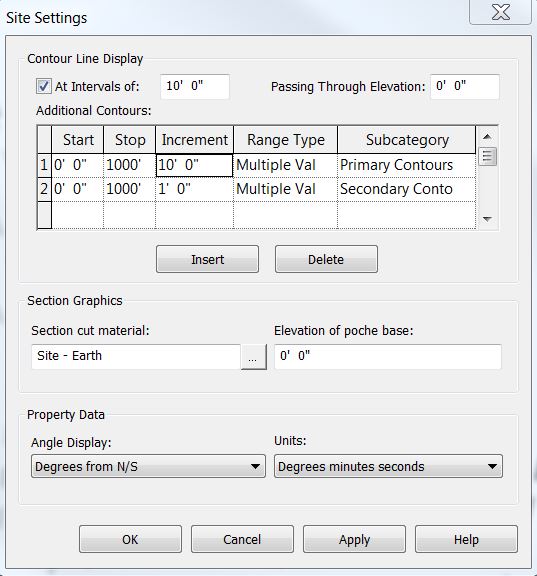
The Site Settings window displays where you tin can edit several items related to the how the topography is displayed. These are the settings I used to get 10' intervals shown as a darker dashed line.
Source: https://evstudio.com/revit-tutorial-importing-topography/
Posted by: mendozafairs1962.blogspot.com
0 Response to "How To Upload A Topography To Revit"
Post a Comment